Every shrimplet that disappears into a power filter intake is a colony that grows just a little more slowly. A sponge filter eliminates that risk entirely, and it does a lot more than just keep babies safe. It is, by a wide margin, the most practical filter choice for a shrimp tank at any level - from a beginner's first 10-gallon cherry shrimp colony to a serious Caridina breeding setup. This article covers why that is, how to match the filter to your tank volume, how to pair it with an air pump, and what to do if you already have a hang-on-back (HOB) or canister running.
If you are still deciding whether a filter is necessary at all, our article on whether shrimp need a filter covers the baseline case. Everything below assumes you have decided a sponge filter is the direction you want to go.
Why sponge filters suit shrimp so well
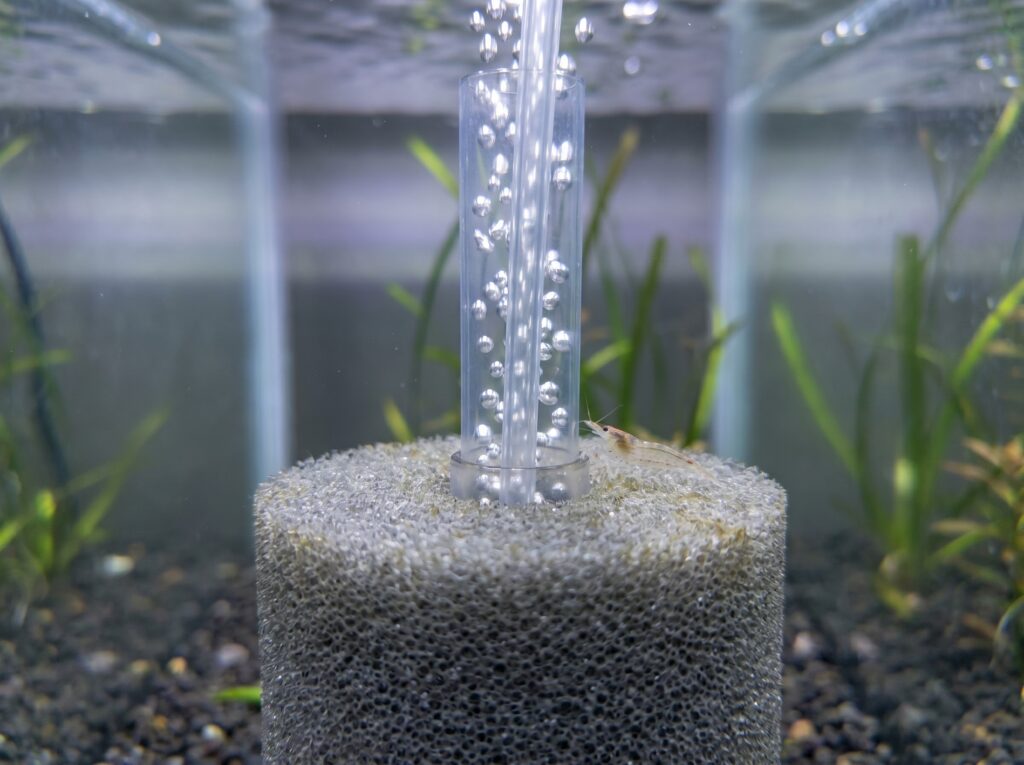
A sponge filter works through an airlift: air from a pump rises up a central tube, and that rising air column pulls water gently through the surrounding foam. The foam captures particles mechanically, but its main job is biological. As Wikipedia's aquarium filter entry puts it, "in most cases, a biological filter is nothing more than a chemically inert porous sponge, which provides a greatly enlarged surface area on which these bacteria can develop." Those bacteria - the nitrifying community that converts toxic ammonia first into nitrite, then into far less harmful nitrate - colonize the pores and stay there as long as you do not scrub them away.
For shrimp, three properties matter more than anything else a filter can offer.
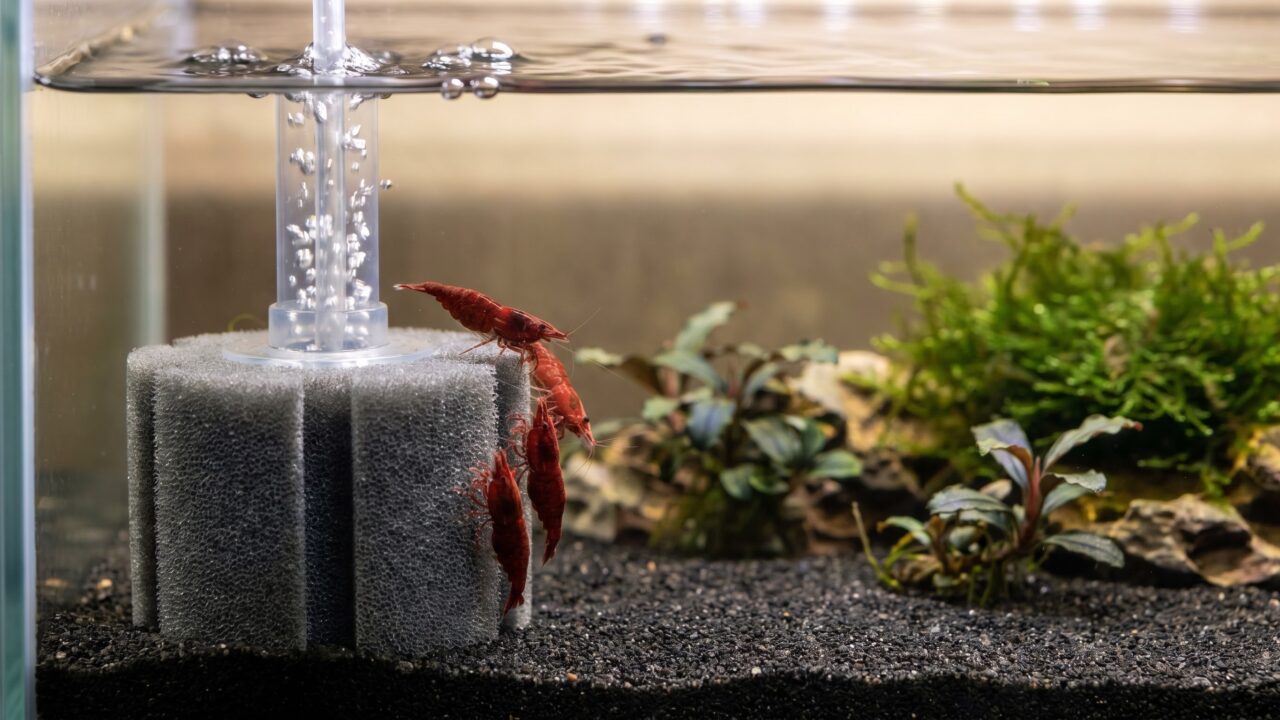
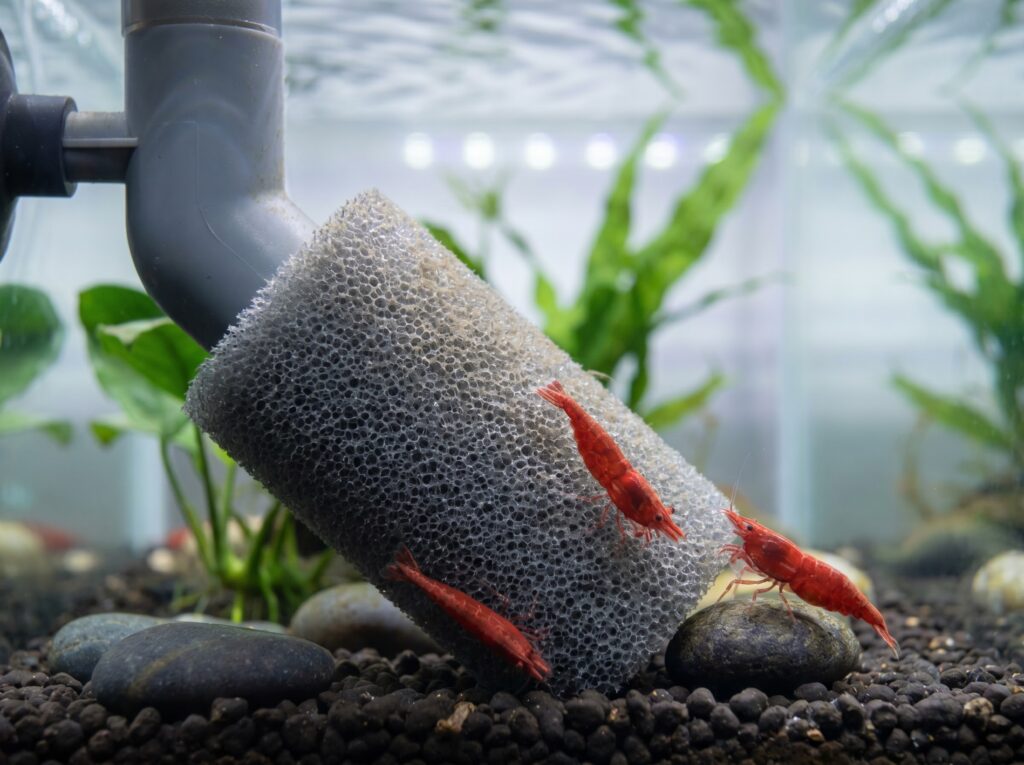
No intake danger. A conventional power filter creates suction at a slotted or perforated intake. Shrimplets - the newly born juveniles that are often less than 3 mm long - are small enough to be pulled straight through those slots. Sponge filters produce no such suction point. Water moves through the foam face at a rate gentle enough that even a newborn shrimplet can swim away from it freely. As aquarium equipment manufacturer Aquarium Co-Op describes their sponge filter design, it is built for "being gentle enough to avoid sucking up fish fry, shrimp, and other slow-moving creatures."
Biofilm on tap. The foam surface does not stay bare foam for long. Within days of running, it develops a living coat of bacteria, protozoa, and fine organic matter - what hobbyists call biofilm. Shrimp are continuous grazers. They spend most of their waking hours picking at surfaces, and the sponge face becomes one of the richest grazing patches in the tank. Baby shrimp especially benefit, because biofilm is available 24 hours a day without any supplemental feeding. For shrimplets in their first two weeks, that constant food source can be the difference between a healthy cohort and one that thins out.
Gentle, stable water movement. Caridina species in particular do poorly with high flow. The airlift system produces mild circulation with stable oxygenation and low-stress water movement. Shrimp are not blown around. They do not waste energy fighting current. For breeding colonies of both Neocaridina and Caridina, that calm is worth more than any efficiency gain from a higher-flow filter. To understand where shrimplets spend their first days and why low disturbance matters, see our piece on where shrimplets go after birth.
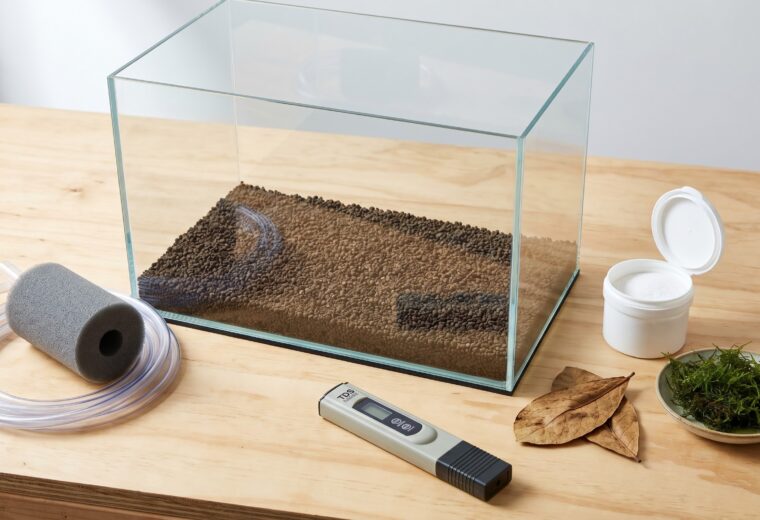
Sizing a sponge filter for your tank
The table below is the practical reference for matching filter to tank. Sponge filters are rated by the manufacturer for a maximum tank volume, but that rating assumes a lightly stocked community tank. A shrimp colony is a light bioload, so you can usually run at the lower end of the range. Where you want to be careful is when you have a heavily planted tank with a large, mature colony and are feeding frequently - in that case, size up by one step.
| Tank volume | Filter size to use | Air pump output needed | Notes |
|---|---|---|---|
| Up to 10 gal (38 L) | Mini or small single sponge | ~1.0-1.5 L/min | Fine for Neocaridina nano colony; matches Hikari Bacto-Surge Mini rating |
| 10-20 gal (38-75 L) | Small or medium single sponge | ~1.5-2.5 L/min | Most starter shrimp tanks land here; a medium filter gives headroom as the colony grows |
| 20-40 gal (75-150 L) | Large single or medium double sponge | ~2.5-4.0 L/min | Two sponge heads also let you clean one at a time without crashing the cycle |
| 40-75 gal (150-280 L) | Large double sponge or two separate filters | ~4.0-6.0 L/min | Breeding operation scale; two separate units = redundancy and split cleaning |
A note on foam density: look for 20 or 30 PPI (pores per inch) foam. Finer foam - 40 PPI - clogs rapidly and cuts flow in a matter of weeks. Quality matters here because cheap filters with dense foam often look fine in product photos but underperform within a month.
One habit that pays off at any tank size: run two separate sponge filters rather than one, especially in a colony you care about. You clean them on a rotation - one this month, the other next month - and the biological colony in the tank never takes a significant hit. This also gives you a seeded spare that can instantly cycle a new tank or quarantine vessel.
Air pump setup

The sponge filter itself does nothing without an air pump. The pump drives everything, and getting the sizing right is genuinely important. Too little air and water barely trickles through the foam, which starves the bacteria of flow and oxygen. Too much air and you get excessive surface agitation that can lower CO2 for planted tanks, and the bubbling noise becomes constant.
The L/min (liters per minute) figures in the table above are a practical starting point. For a single small sponge on a 10-gallon shrimp tank, a pump rated around 1.0-1.5 L/min is sufficient. For a double sponge on a 30-gallon setup, look for 3.0-4.0 L/min. Add 20-30% if you are splitting the air line to run two filters from one pump via a gang valve - the split reduces pressure to each head.
A few setup details that matter:
- Place the air pump above the waterline where possible, or use a check valve on the airline tubing. If the pump loses power, water can siphon back down the tube and flood the pump. A check valve prevents this and costs almost nothing.
- Use rigid airline tubing where the line runs behind the tank, and flexible silicone tubing for the final connection to the filter. Silicone stays flexible longer and does not crack.
- Dial down the flow with an adjustable gang valve or an inline flow regulator. The sponge filter needs a steady stream of medium-sized bubbles, not a violent churn. You want the uplift tube producing a quiet, consistent rise of water - not foam and turbulence at the surface.
- Noise is the main real-world complaint with air-driven filtration. A diaphragm pump placed on a folded cloth or foam pad transmits far less vibration to the surface it sits on. Some keepers run the pump inside a cabinet to reduce audible noise further.
Pre-filter sponges on HOB and canister filters
Sometimes a sponge filter is not the only filter in your setup. You might have a hang-on-back or canister from a previous tank, or you want the extra mechanical capacity it provides. You do not have to choose - but you do need to cover the intake.
A pre-filter sponge is a foam cylinder that slips over the intake tube of a HOB or canister filter. It serves the same protective function as a standalone sponge filter: it stops shrimplets from reaching the impeller. The foam pore size matters here - coarse enough to flow freely, fine enough to block a 2-3 mm juvenile. Foam cylinders with 20-30 PPI density work well for this purpose.
Pre-filter sponges also add real biological filtration. Because they are always wet and have constant flow, they colonize with nitrifying bacteria just as a standalone sponge filter would. Aquarium science resources confirm that "materials with a greater surface area provide both mechanical and biological filtration," and a pre-filter sponge adds meaningful surface area to any HOB or canister setup.
Maintenance of a pre-filter sponge follows the same rule as a standalone filter: clean it gently in tank water, not tap water. Tap water kills the bacteria you are relying on. Rinse it roughly every two to four weeks depending on the bioload in your tank - when you notice outflow from the HOB or canister starting to drop, that is the clog signal.
The wider topic of what equipment a shrimp tank needs from the start is covered in our guide on what you need for a shrimp tank.
Cycling before you stock - the step that cannot be skipped
A sponge filter is excellent at building and maintaining a biological colony, but only if you give it time to do so before the shrimp go in. This is the most common mistake beginners make: they set up the filter, run it for a few days, and add shrimp. The result is ammonia and nitrite exposure that stresses or kills the animals.
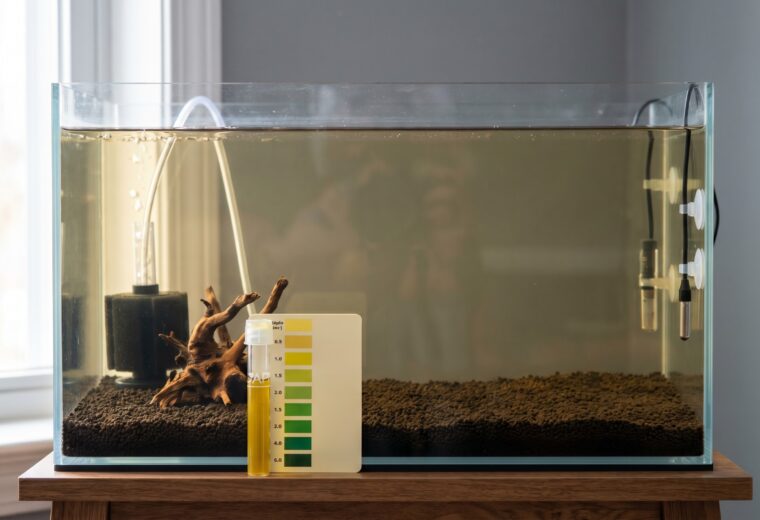
A new filter needs three to eight weeks to fully cycle. According to Aqueon's nitrogen cycle guide, "you'll know your tank is fully cycled when nitrates are being produced, and ammonia and nitrite levels are at zero." Both ammonia and nitrite must read zero on a test kit before any shrimp go in. Not close to zero. Zero.
Sponge filters make the cycling process straightforward. Drop the filter in, add an ammonia source (a pinch of fish food works, or pure ammonia solution), test every few days, and wait for the readings to show the complete conversion. Once nitrite reads zero and nitrate is climbing, the filter is seeded and ready. Shrimp added to a cycled sponge filter tank have a dramatically better survival rate than those added to an uncycled one - no matter how well-intentioned the setup is.
Copper warning. Shrimp are far more sensitive to copper than fish are, and what a fish tolerates without visible harm can kill a shrimp colony within hours. The mechanism is ionoregulatory: at elevated concentrations, copper interferes with the gill transport proteins that maintain sodium and osmotic balance, causing rapid physiological collapse even before other symptoms appear. Never dose copper-containing medications in a shrimp tank, and avoid copper-based plant fertilizers. If your tap water runs through old copper pipes, let it flush for 30 seconds before using it. This applies whether you run a sponge filter, HOB, or canister - the filter does not protect against dissolved copper.
Drip acclimation. Drip-acclimate any new shrimp before adding them to the tank. Sudden TDS or parameter swings cause osmotic shock, and it kills shrimp that look perfectly healthy in the bag. A common approach is 1-3 drops per second over 1-2 hours, which gently doubles or triples the water volume the shrimp are sitting in. The exact rate matters less than giving the process enough time - slower is always safer.
Maintenance: what to do and what not to do
The biggest myth in filter maintenance is that a clean filter is a better filter. The opposite is usually true. The bacterial community inside the foam is the entire point of the filter. Aggressive cleaning destroys it.
The rule, tested and documented by aquarium science researchers, is this: a newly established sponge filter (months old) cleaned under running water - even unchlorinated water - loses virtually all its beneficial bacteria. The same filter cleaned by one or two gentle squeezes in a bucket of tank water retains significant bacterial colonies. After years of operation, the bacterial community is embedded deeply enough that running water cleaning is survivable. But for a filter under 12 months old, tank-water rinse only, every time.
Practically speaking, for a shrimp tank with a moderate colony:
- Check the outlet flow every week or two. When it noticeably weakens, the sponge face is clogged with debris and needs a rinse.
- Remove the sponge and squeeze it two or three times in a bucket of tank water pulled during your water change. The water will run brown. Stop when it runs mostly clear.
- Return the sponge to the tank immediately. Do not leave it out of water longer than a few minutes.
- For most lightly stocked shrimp tanks, this happens every two to four months. Some well-planted tanks with low bioload go longer.
- When the foam starts to tear or crumble on squeezing, replace it - but replace only half at a time if you run a dual sponge setup. This preserves the biological colony while the new foam section seeds.
One last practical note: after any significant maintenance or cleaning, test for ammonia and nitrite the next day. A small spike is possible; catching it early with a 10-15% water change is far better than finding out later when shrimp are stressed.