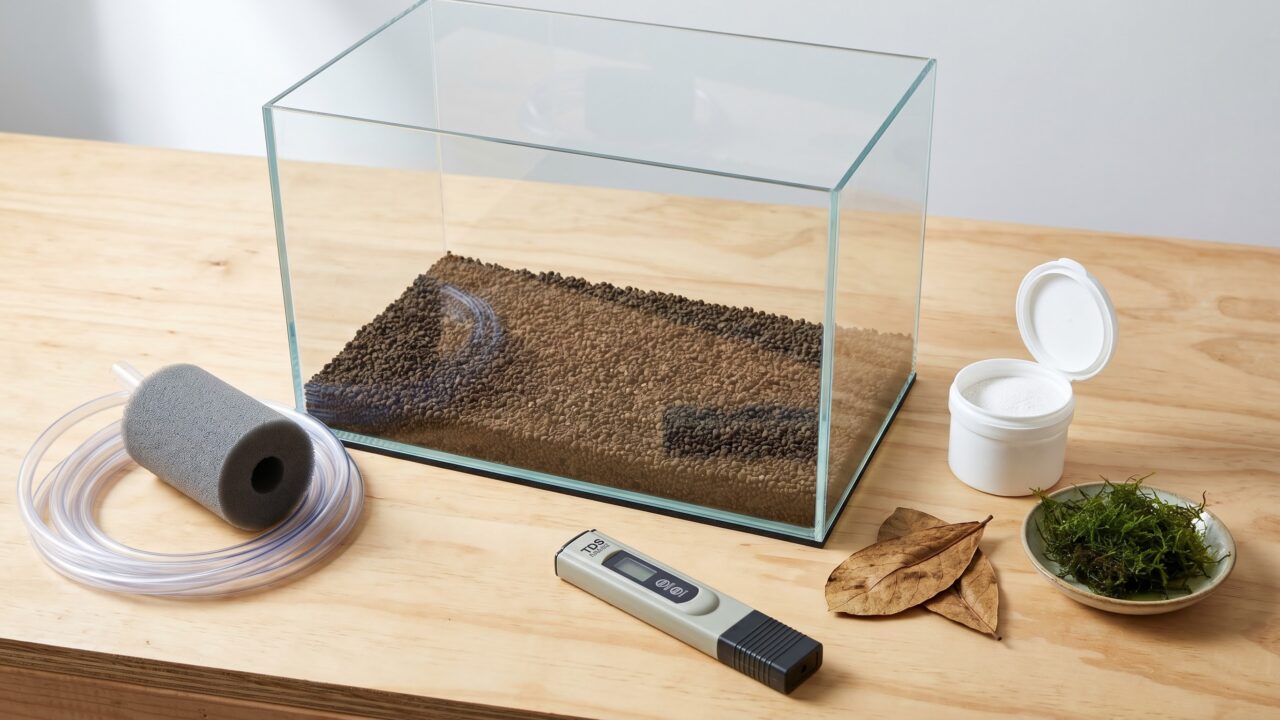
Five gallons of water, a sponge filter, the right substrate, and stable parameters - that is the core of a successful shrimp tank. Everything beyond that is either optional or species-specific depending on whether you plan to keep Neocaridina (cherry shrimp and their color variants) or Caridina (crystal red, bee shrimp, Taiwan bee). The list is short but precise, and getting the essentials right in the first two weeks matters far more than how much gear you buy.
This checklist walks through every item in order of importance, explains what it does, and tells you which items you can skip until later. A gear table at the end lets you see the full picture at a glance.
Tank size: why 5 to 10 gallons is the sweet spot
Shrimp are small animals, but they are not suited to tiny tanks. A 2-gallon nano cube sounds practical until a single overfeeding event spikes ammonia and wipes the colony overnight. Water volume is your primary buffer against beginner mistakes, and a well-set-up nano tank in the 5 to 10 gallon range gives you enough stability to learn the hobby without losing shrimp to parameter swings you cannot react to quickly enough.
A 5-gallon tank holds roughly 20-30 adult Neocaridina comfortably and will grow to 40-50 as the colony breeds. A 10-gallon gives you more room, more stable temperature, and a gentler learning curve. Anything under 5 gallons requires near-daily monitoring that most beginners underestimate. Anything over 20 gallons is fine but unnecessary for a first colony.
Tank shape matters less than footprint. A standard rectangular tank has better surface area for gas exchange than a tall, narrow column. Low and wide beats tall and narrow for shrimp.
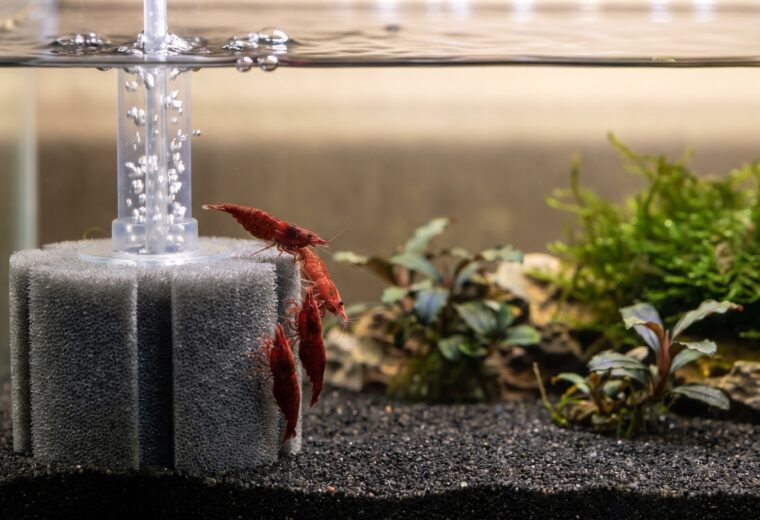
Filtration: sponge filter plus a pre-filter sponge on anything else
A sponge filter is the single best filtration choice for a shrimp tank. It runs on an air pump, moves water gently across a foam sponge where beneficial bacteria colonize, and produces no intake suction that can trap baby shrimp. Shrimplets are tiny - some species emerge at under 2 mm - and a hang-on-back or canister filter without protection will pull them in and kill them. For a complete breakdown of why sponge filtration works so well, see our sponge filter guide.
If you already own a different filter type, a foam pre-filter sleeve over the intake solves the safety problem. These cost a few dollars, slip over any standard intake tube, and double as a biofilm grazing surface that shrimp actively feed from. Do not skip this step if your filter has a bare intake tube.
Flow rate matters too. Shrimp prefer gentle, diffuse flow. A sponge filter rated for the tank size will provide the right turnover without blasting shrimp across the tank. Avoid powerheads and high-flow HOB filters in tanks under 10 gallons unless you significantly reduce their output.
The filter must be fully cycled before you add any shrimp. The nitrogen cycle converts toxic ammonia (from shrimp waste and uneaten food) to nitrite, then to the far less harmful nitrate. According to Aqueon, this process typically takes three to eight weeks, and the tank is ready when ammonia and nitrite both read zero on a test kit. Adding shrimp to an uncycled tank is the single highest-frequency cause of sudden early losses.
Substrate: inert for Neocaridina, active for Caridina
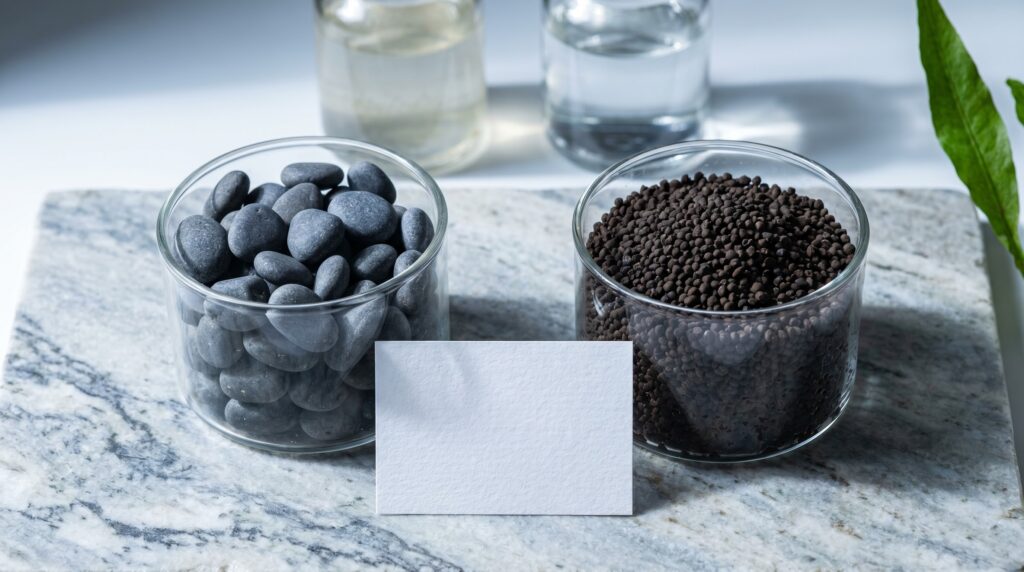
Substrate choice is where Neocaridina and Caridina keepers diverge completely, and using the wrong substrate for the wrong species is a common and expensive mistake.
Neocaridina - cherry shrimp, blue dreams, bloody marys, and all the other color variants - thrive on inert substrate. Plain aquarium gravel, sand, or a baked-clay substrate like Eco Complete work well. Inert substrate does not alter your water chemistry, which means the GH, KH, and pH you set with your remineralizer stay where you put them. Neocaridina target parameters are roughly GH 6-8, KH 1-4, TDS 150-250, and pH 6.5-7.5. Tap water in many regions already falls close enough to use directly (test it first), and a dechlorinator plus a GH/KH remineralizer handles the rest.
Caridina species - crystal red, crystal black, and Taiwan bee shrimp - require soft, acidic water. GH 4-6, KH as close to zero as possible, TDS 100-150. For pH, the target range for Crystal Red and general bee shrimp sits at 5.8-6.4; experienced keepers targeting high-grade Crystal Red SS+ and Taiwan Bee typically aim for the tighter 5.8-6.2 range, but that precision is unnecessary and riskier for beginners starting with standard Crystal Red. The only practical way to hold pH in the low-to-mid 6 range in a home tank is an active buffering substrate - an aquasoil like ADA Aquasoil, Fluval Stratum, or equivalent products. These substrates work as cation exchangers: they bind carbonate ions from the water column, pulling KH down and holding pH below 7 without any chemical additives. They exhaust over time, often 12-24 months depending on water hardness and how much KH your source water contributes - with hard tap water the buffer can deplete in 6-8 months, while tanks filled with properly remineralised RO water (near-zero incoming KH) may hold pH for two years or more. When the substrate is spent, pH begins creeping upward and the substrate needs replacement. Caridina on an inert substrate with tap water will struggle and usually fail to breed, because without the cation exchange mechanism there is nothing to suppress carbonate hardness and pH stays too high. Active substrates are not optional for this genus.
One important note: active substrate only buffers correctly in very low KH water. If you use tap water with meaningful KH, the substrate fights a losing battle against the carbonate buffer and pH stays too high. Caridina keepers almost always start with RO water and add a GH-only remineralizer (no KH component).
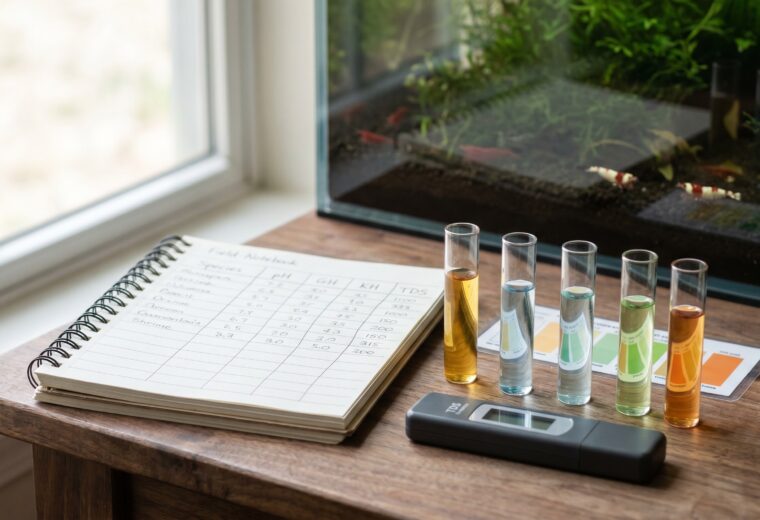
Water preparation: remineralizer and TDS pen
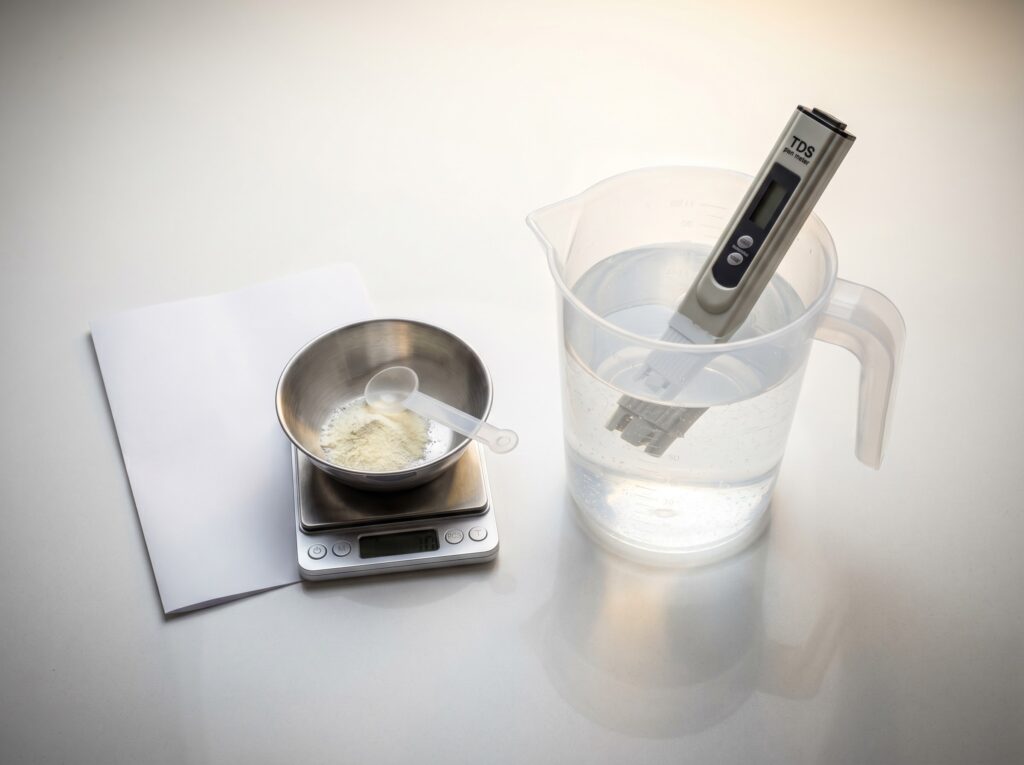
Understanding your water is not optional in this hobby. The two tools you need are a GH/KH test kit and a TDS pen.
A TDS pen measures total dissolved solids - all the minerals, salts, and trace elements in your water as a single number in parts per million. It does not tell you what those dissolved solids are, which is why you still need a GH/KH test to understand the specific mineral composition. But TDS is the fastest daily check to confirm your water is in range and that your remineralizer dose is consistent. Inexpensive digital TDS pens (under $15 from most aquarium suppliers) are accurate enough for the hobby. Learn more about what TDS means for shrimp.
For Neocaridina kept on RO water or soft tap water, a GH/KH remineralizer brings the water up to target parameters. SaltyShrimp Shrimp Mineral GH/KH+ is a widely used manufacturer option: according to the product specification, approximately 2 g per 10 litres of RO water reaches a total hardness of about 6 dGH and a conductance of around 300 µS - roughly 150-200 TDS depending on your meter's conversion factor. For Caridina, a GH-only remineralizer (SaltyShrimp Bee Shrimp Mineral GH+, for example) targets a conductance of around 200 µS with near-zero KH, letting the active substrate handle pH.
Always mix remineralizer into the new water in a separate container before adding it to the tank. Never dump powdered remineralizer directly onto shrimp. Check the TDS of the prepared water before it goes in.
Tap water can work for Neocaridina if your municipal supply is reasonably clean and within range, but test it for GH, KH, and run it past a copper test strip first. Old copper plumbing is a real hazard. Water that sits overnight in copper pipes can pick up enough copper to stress or kill shrimp. The first draw from a tap after overnight standing is the highest risk. Letting the tap run for 30-60 seconds before filling a bucket reduces this, but if you have older plumbing, RO or a dedicated water filter removes the uncertainty entirely.
Shrimp are orders of magnitude more sensitive to copper than fish are. Peer-reviewed acute toxicity testing on freshwater swamp shrimp places the 96-hour LC50 for copper at 0.0313 mg/L - and at the cellular level, copper ions disrupt the cooperative oxygen-binding function of hemocyanin, the protein that carries oxygen in shrimp blood. Either way, any detectable copper poses a real risk and should be treated as a hard disqualifier. The same rule applies to medications and plant fertilizers - always check the ingredient list before adding anything to a shrimp tank. Any product containing copper sulfate is incompatible with shrimp. See our full copper guide for the complete list of sources to avoid.
Consistency across water changes matters more than chasing an ideal number on paper. A colony sitting at TDS 200 month after month will outperform one that bounces between 150 and 280 each time you top up, even if 200 is not the textbook target. When you do water changes, match the temperature and TDS of the new water to the tank before adding it. Osmotic shock - the physiological disruption caused by a sudden shift in dissolved solids concentration - is one of the leading silent killers in shrimp tanks. Full parameter guidance for both genera is here.
Botanicals and plants: biofilm is the real food chain
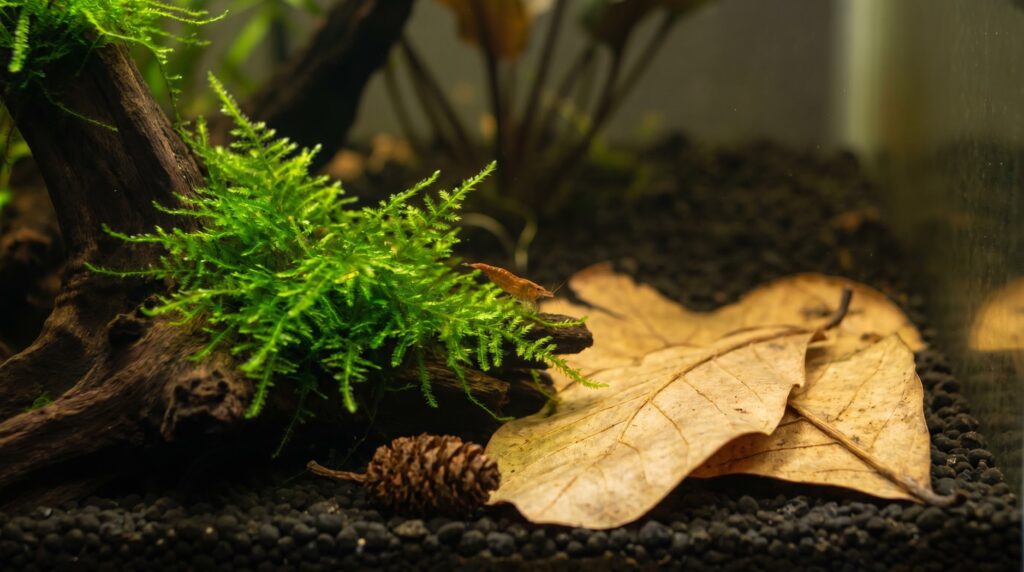
Shrimp graze almost constantly. Their natural diet in streams and rivers is biofilm - the thin layer of bacteria, fungi, algae, and microorganisms that coats any submerged surface. In a new tank, biofilm takes time to establish, and adding structure that promotes it makes a tangible difference to how quickly shrimplets grow and how actively adults feed.
Botanicals are the simplest biofilm accelerant. Indian almond (catappa) leaves, alder cones, and dried oak leaves sink, soften, and become colonized by the microorganisms shrimp eat. The tannins they release are not harmful at normal doses and are mildly beneficial in soft-water Caridina setups. Two or three alder cones or one catappa leaf per five gallons is a reasonable starting point. Replenish them as they break down over several weeks.
Live plants do the same job with the added benefit of consuming nitrates and providing structure. Java moss is the classic choice - it grows slowly, tolerates a wide range of parameters, and creates dense, biofilm-rich surfaces that shrimp and especially shrimplets pick at for hours. Java fern, anubias, and any stem plant with fine leaves all work well. Floating plants like frogbit or red root floater shade the tank, reduce algae, and give surface-seeking shrimp something to climb.
Plants also provide cover during molting, which is when shrimp are most vulnerable. A shrimp that has just shed its exoskeleton is temporarily soft-bodied and hides for several hours while the new shell hardens. Dense planting reduces stress during this period and gives shrimplets enough refuge to survive in a colony.
Food: what to buy and how much to feed
Shrimp in a mature, planted tank with good biofilm coverage do not need daily feeding. Overfeeding is more dangerous than underfeeding - uneaten food spikes ammonia, clouds the water, and promotes bacterial blooms that stress and can kill shrimp. Start with small amounts every other day and adjust based on how quickly food disappears.
A complete feeding setup for beginners has two components: a staple granule food and a supplemental biofilm food like GlasGarten Snow Flakes. Snow Flakes are made from 100% organic soy bran, which according to the manufacturer is "rich in vitamins, amino acids, trace elements and fibre." Once they soften, shrimp pick at them directly; any remaining material supports mycelial growth that shrimplets graze on for days afterward. The recommended dose is 0.5 cm of stick per 10-15 shrimp. They do not cloud the water or spike ammonia quickly, which makes them beginner-friendly. See our full guide to the best shrimp foods.
Blanched vegetables - zucchini, spinach, cucumber - are optional but cheap and useful. Blanch briefly in boiling water to soften, then cool completely before adding. Remove whatever the shrimp do not eat within 24 hours to prevent fouling.
New shrimp should not be fed for the first 48 hours after introduction. They are recovering from shipping stress and acclimation, and forcing food into a new environment with competing bacteria can tip water quality before the colony is settled.
Heater: conditional, not universal
Neocaridina shrimp tolerate temperatures from about 18 to 26 C (64-79 F), with optimal breeding conditions in the 22-24 C range. If your home stays in that range year-round, a heater is not necessary. In rooms that drop below 18 C in winter, or in houses with significant day-to-night swings, a small adjustable heater set to 21-22 C prevents the stress that comes from temperature instability. In normally heated living spaces a heater is often not required - but the key word is normally. If your room swings more than 4-5 degrees between day and night, a heater earns its place purely as a stability device rather than a heat source.
Caridina shrimp are more temperature-sensitive and generally struggle above 24-25 C. In warm climates or during summer, a chiller (or at minimum, a fan blowing across the water surface) becomes relevant. This puts Caridina beyond easy beginner territory, which is one of several reasons they are recommended only after experience with Neocaridina.
Whatever your situation, add a simple digital thermometer to the tank. Temperature swings are invisible without one, and even a 2-3 degree drop overnight in a cool room can trigger a stress molt. Read more about whether your setup specifically needs a heater in our dedicated article.
Acclimating new shrimp: the step that most beginners skip
Never pour new shrimp directly from the bag into the tank, even if the water parameters look identical on paper. The actual water chemistry, temperature, and microbial composition differ between bag water and tank water, and dumping shrimp into a sudden change triggers osmotic shock - a physiological disruption at the cellular level that can cause slow dieoffs over one to two weeks after what looked like a successful introduction.
Drip acclimation over 60-90 minutes is the standard approach. Float the bag for 15 minutes to equalize temperature. Then open the bag, place the shrimp and their water in a small container, and use a piece of airline tubing with a loose knot or valve to siphon tank water into the container at a slow drip - roughly 1-3 drops per second is the general guidance across experienced keepers. When the container volume has roughly doubled, discard half the water and repeat. After the second doubling, use a fine net to transfer the shrimp into the tank and pour the container water down the drain. The whole process takes about 60-90 minutes and dramatically reduces losses.
The essential vs. optional gear table
| Item | Essential or optional | For Neocaridina | For Caridina | Why |
|---|---|---|---|---|
| 5-10 gallon tank | Essential | Yes | Yes | Volume stability; smaller tanks swing too fast for beginners |
| Sponge filter + air pump | Essential | Yes | Yes | Fry-safe, gentle flow, excellent biological filtration surface |
| Pre-filter sponge (if not using sponge filter) | Essential if non-sponge filter | Yes | Yes | Prevents shrimplets being sucked into intake; costs under $5 |
| Inert substrate (gravel/sand) | Essential for Neocaridina | Yes | No | Does not alter water chemistry; pH stays where you set it |
| Active buffering substrate (aquasoil) | Essential for Caridina | No | Yes | Buffers pH to 5.8-6.4 for Crystal Red (tighter 5.8-6.2 for high-grade/Taiwan Bee) and holds KH near zero; cannot be replaced by chemicals alone |
| GH/KH test kit | Essential | Yes | Yes | TDS pen alone cannot tell you mineral composition; test before first stock and after any water source change |
| TDS pen | Essential | Yes | Yes | Fast daily parameter check; confirms remineralizer dose consistency; under $15 |
| Ammonia + nitrite test kit | Essential (during cycling) | Yes | Yes | Confirms tank is cycled before stocking; 0/0 is the green light |
| GH/KH remineralizer | Essential if on RO water | Yes (GH/KH+) | Yes (GH+ only) | RO water has zero minerals; shrimp need GH (calcium, magnesium) for shell formation and molting |
| Dechlorinator | Essential if on tap water | Yes | Rarely (usually on RO) | Removes chlorine/chloramine from tap water; add before any tap water enters the tank |
| Heater | Conditional | If room below 18 C | Yes (stability) | Room temperature Neocaridina tanks work fine in most homes; Caridina benefit from consistent 21-23 C |
| Thermometer | Essential | Yes | Yes | Temperature swings are invisible without one; a $5 digital stick thermometer is sufficient |
| Live plants (java moss, java fern, anubias) | Highly recommended | Yes | Yes | Biofilm surfaces for grazing; cover during molting; nitrate consumption; shrimplet survival |
| Botanicals (catappa leaves, alder cones) | Optional but useful | Yes | Yes | Accelerates biofilm establishment; provides natural foraging surfaces; cheap |
| Biofilm supplemental food (Snow Flakes) | Recommended | Yes | Yes | Supports young shrimp in tanks without mature biofilm; does not spike ammonia quickly |
| Staple shrimp granule food | Essential | Yes | Yes | Balanced diet beyond biofilm; feed small amounts every 1-2 days; remove leftovers within 24 hours |
| CO2 injection | Optional | Optional | Optional | Helps plants grow faster; not required for easy plants (java moss, java fern, anubias); can cause pH swings if not monitored |
| RO unit | Optional for Neo; recommended for Caridina | Optional | Recommended | Removes copper, chloramine, and unknown minerals from tap water; essential for Caridina parameter precision |
| Airline tubing + drip knot (for acclimation) | Essential (one-time use) | Yes | Yes | Drip acclimating new shrimp prevents osmotic shock; a 1-meter piece of airline tubing costs under $2 |
One thing to check before you buy shrimp
Confirm that nothing in your tank or plumbing chain contains copper. This means: no copper-based medications anywhere in the tank's history, no fertilizers listing copper sulfate, no brass fittings on your plumbing or air pump components, and if you are on a municipal supply, no old copper pipes between the main and your tap. Copper disrupts the hemocyanin that carries oxygen in shrimp blood - peer-reviewed research places the 96-hour lethal threshold for freshwater shrimp at roughly 0.03 mg/L, and sub-lethal chronic exposure impairs molting and reproduction well below visible cloudiness. Any detectable copper is reason to find a different water source. Run a copper test strip if you have any doubt about your water source.
Once you have confirmed clean water, a cycled filter, and the right substrate for your chosen species, you are ready. Start a colony of at least 10 shrimp - small groups are more prone to inbreeding stress and slower to establish a breeding cycle. Feed lightly, change water in small increments (10-15% at a time, matched to tank temperature and TDS), and give the tank 8-12 weeks to mature before expecting regular breeding. Consistent parameters across that window matter far more than landing on a textbook target reading.