Most beginner shrimp colonies die in the first month - and almost every time, the cause is one of the same five avoidable mistakes. The good news is that dwarf shrimp are genuinely easy to keep once you understand what they actually need: a cycled tank, stable water chemistry, the right species, and a little patience. This guide covers all of it, from scratch.
What dwarf shrimp are (and why they make great tank inhabitants)
Dwarf shrimp are small freshwater crustaceans in the family Atyidae. The ones you'll find in the hobby belong mainly to two genera: Neocaridina and Caridina. They top out at about 3-4 cm (roughly 1.5 inches) when fully grown, spend their days grazing constantly on biofilm, algae, and food particles, and reproduce readily when water conditions are good.
Biofilm - the thin microbial mat that coats every submerged surface in a mature tank - makes up the core of a shrimp's natural diet. Shrimp graze on it continuously, picking at plants, wood, and substrate all day. A well-established tank with real surfaces (wood, stones, live plants, a sponge filter) provides this automatically. That is why a mature, seasoned tank outperforms a brand-new one every time: the biology is already running.
Shrimp are also colonial animals. A lone shrimp is a stressed shrimp. Starting with around 10 individuals gives the colony a social density that encourages normal behavior and faster breeding. Pick a number inside the range, dial it in, and leave it there. The shrimp living at a rock-steady 7.2 pH will outlast and outbreed the colony whose pH yo-yos between 6.8 and 7.6, even though both numbers are technically within range.
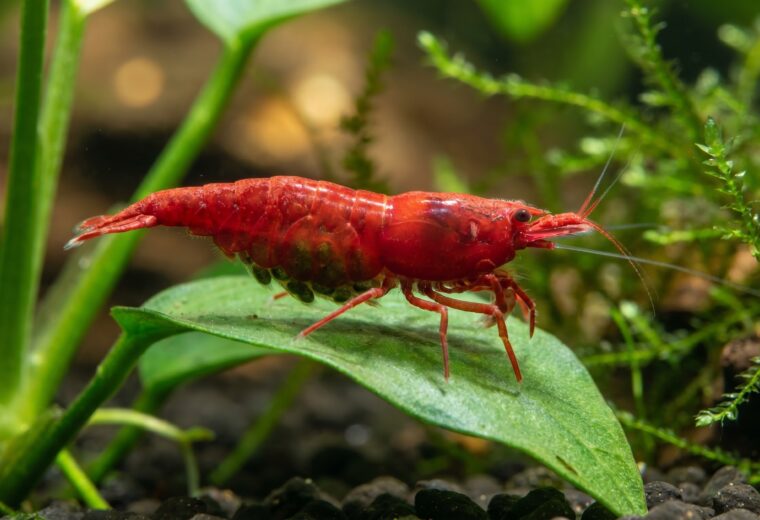
Neocaridina first, every time
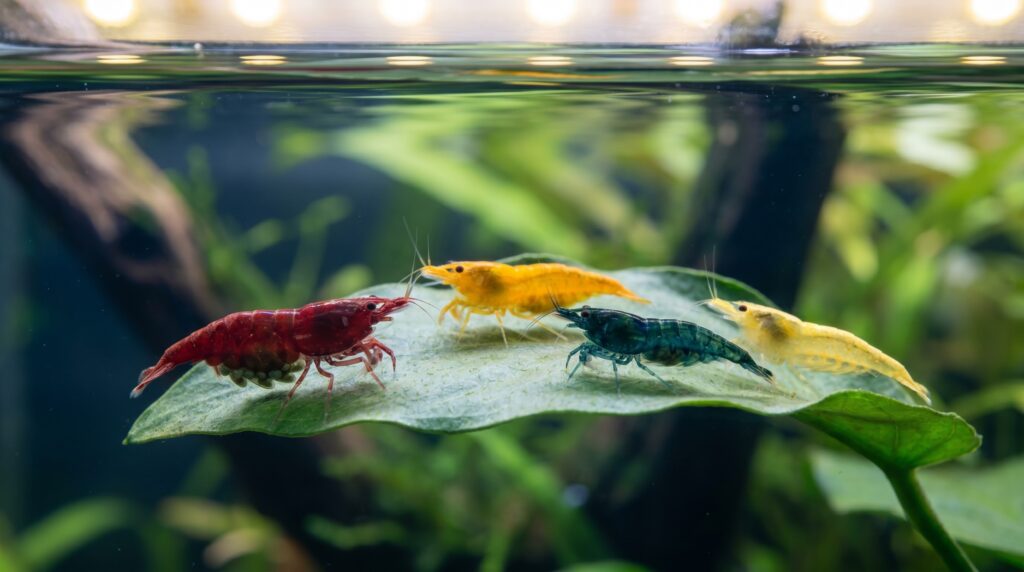
If you are keeping shrimp for the first time, choose Neocaridina. Cherry shrimp (red) are the most popular entry point, but the same species has been selectively bred into a wide range of colors - orange, yellow, blue, green, violet, and more - all equally well-suited to a beginner setup. For a detailed breakdown of which color form suits your taste and tank, see our guide to the best shrimp for beginners.
Neocaridina davidi, the species behind all of these color forms, is native to the inland lakes, ponds, and streams of East Asia and adapts readily to a broad spectrum of water conditions. That tolerance is exactly what makes it forgiving for beginners. It does not need a specialized substrate, does not require RO water in most cases, and will breed in a straightforward tap-water setup as long as the parameters land in a reasonable range.
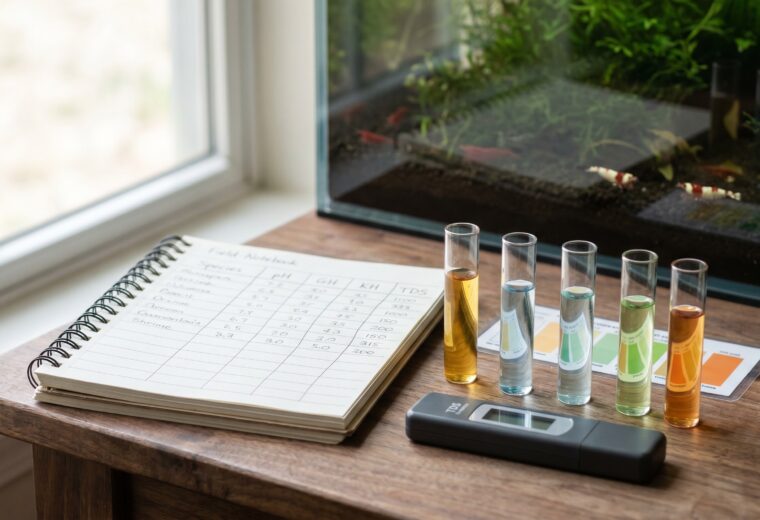
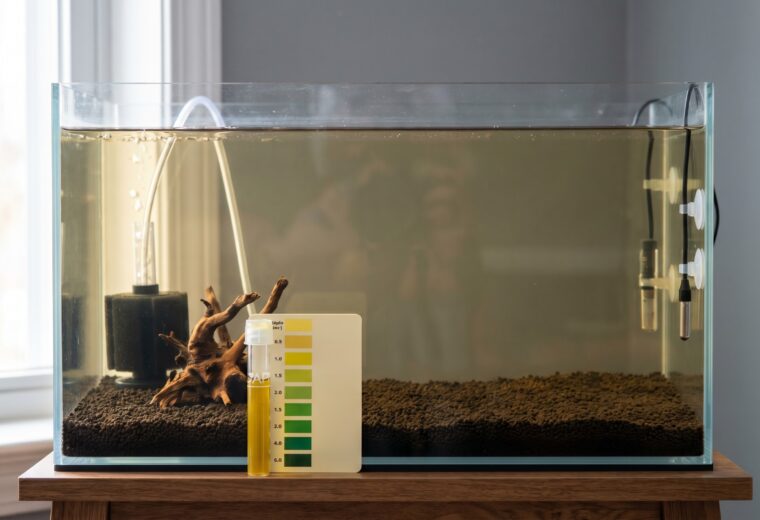
The numbers to aim for:
| Parameter | Target range for Neocaridina | Why it matters |
|---|---|---|
| GH (general hardness) | 6-8 dGH | Calcium and magnesium for exoskeleton building and successful molting |
| KH (carbonate hardness) | 1-4 dKH | pH buffer; moderate KH stabilizes pH swings |
| TDS (total dissolved solids) | 150-250 ppm | Overall mineral load; a proxy for water richness |
| pH | 6.5-7.5 | Affects enzyme function and ion uptake |
| Temperature | 18-26°C (64-79°F) | Higher end speeds metabolism and breeding; lower end slows both |
| Ammonia | 0 ppm | Any detectable ammonia is toxic |
| Nitrite | 0 ppm | Any detectable nitrite is toxic |
| Nitrate | Below 20 ppm | Elevated nitrate suppresses breeding and stresses shrimp over time |
These are general guidance ranges drawn from consistent keeper experience. The key principle: hit a number within the range and then hold it steady. A shrimp living at a stable 7.0 pH is fine. A shrimp whose pH swings from 6.5 to 7.5 in a single day is under constant physiological stress.
For a full explanation of what each parameter does and how to test it, our shrimp water parameters guide goes deeper on the chemistry. The cherry shrimp care guide also covers species-specific husbandry in detail.
Why Caridina is not a beginner species
Caridina shrimp - crystal red, crystal black, Taiwan bee, and their relatives - are genuinely beautiful. They are also significantly more demanding. They need much softer, more acidic water: GH 4-6, KH 0-1, TDS 100-150 ppm, and pH 5.8-6.4. Achieving and holding that chemistry requires RO (reverse osmosis) water remineralized with a dedicated product, and it requires an active buffering substrate - a specialized aquarium soil that slowly acidifies the water and must be replaced every 12-18 months. Without that substrate, pH will drift upward and the shrimp will die.
There is also no shared middle ground between the two genera. Neocaridina and Caridina want fundamentally different water chemistry, so putting both in one tank means compromising both. One further practical note: Amano shrimp (Caridina multidentata), a popular algae-eating Caridina species often sold alongside cherry shrimp, cannot breed in freshwater at all - their larvae require saltwater to develop before returning to fresh water as adults. This means any Amano shrimp you buy will never reproduce in your tank, which matters if colony growth is part of your plan. Start with Neocaridina, learn what stable water feels like, and revisit Caridina once you have a few months of successful colony management behind you. Our article on why Caridina is not for beginners walks through the specific pitfalls in more detail.
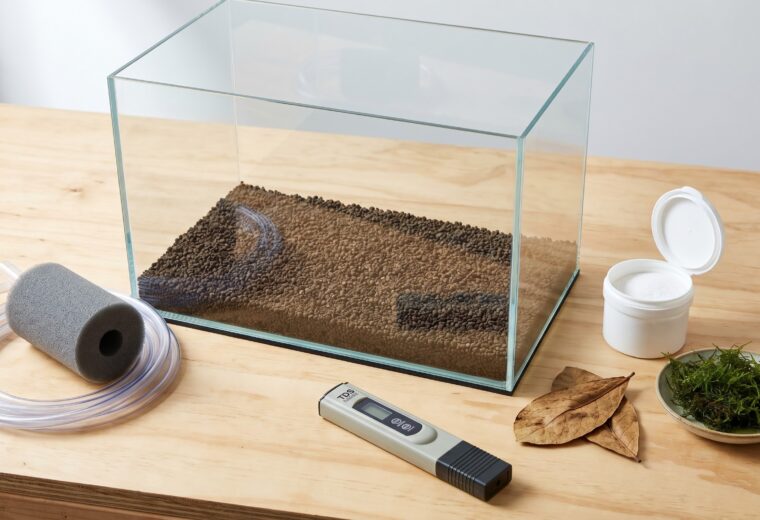
The simple recipe: what a first shrimp tank actually needs
A working shrimp setup does not need expensive equipment. It needs a short list of things done correctly.
Cycle the tank before you add any shrimp
This is the single most important step, and it is the one most beginners skip. Cycling means establishing a colony of nitrifying bacteria that converts toxic ammonia (from shrimp waste and uneaten food) first into nitrite, then into the far less harmful nitrate. The goal, as aquarium biology describes it, is "to establish a robust colony of nitrifiers" before any livestock enters the water. A tank without this bacterial foundation will spike ammonia and kill shrimp within days.
A fishless cycle typically takes four to six weeks. Add a small ammonia source, test regularly, and wait until both ammonia and nitrite hold at 0 ppm while nitrate appears. Only then is the tank ready. Our guide on cycling a shrimp tank gives step-by-step instructions.
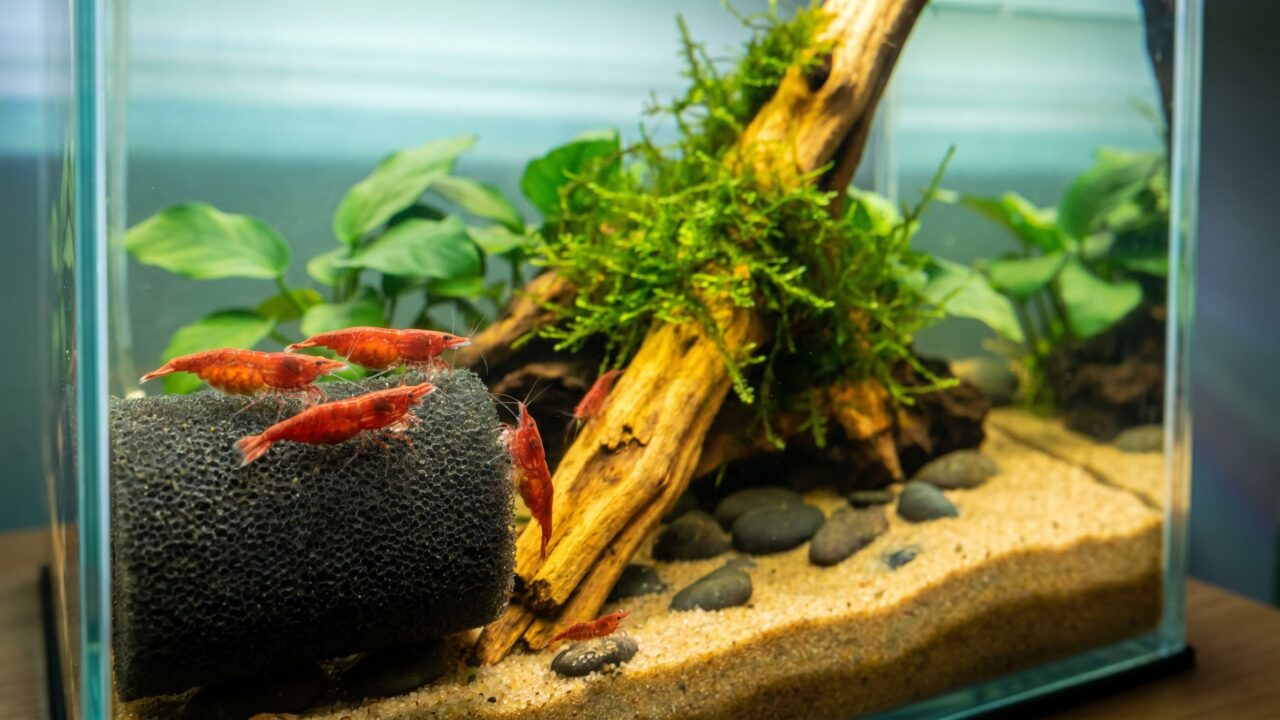
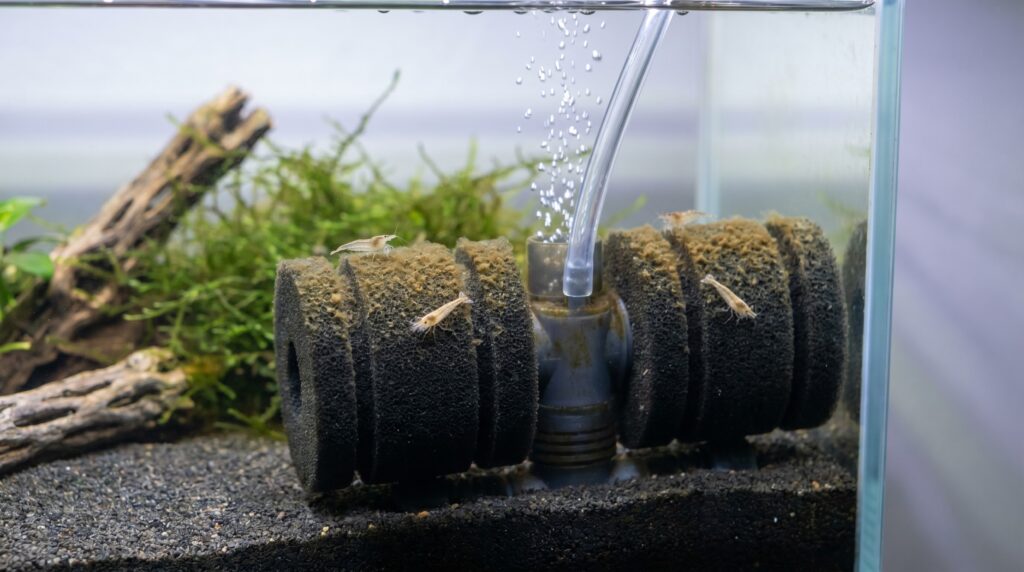
Use a sponge filter
A sponge filter run by an air pump is the standard choice for shrimp tanks, and for good reason. The gentle, diffuse flow will not suck in newborn shrimplets. The sponge surface itself becomes colonized by the same beneficial bacteria that run the nitrogen cycle and also grows a thin layer of biofilm that shrimp graze on directly. Hang-on-back filters and canister filters with unguarded intakes can trap and kill baby shrimp. If you use any power filter, fit the intake with a fine pre-filter sponge. For a deeper look at filtration options and their trade-offs, see do shrimp need a filter.
Know your tap water - or switch to RO
Many keepers run Neocaridina successfully on dechlorinated tap water. The steps are simple: treat every water change with a dechlorinator that removes both chlorine and chloramine (Seachem Prime removes both and also detoxifies ammonia temporarily, buying safety margin during a cycle), then test GH, KH, and pH before you rely on tap water long-term.
If your tap water falls outside the Neocaridina range (very soft, very hard, or extreme pH), RO water remineralized with a dedicated product is the reliable alternative. SaltyShrimp GH/KH+ is widely used for Neocaridina: the manufacturer specifies that approximately 2 g per 10 litres (in RO water) achieves roughly 6 dGH and 300 µS conductance, with the product raising GH and KH at a consistent 2:1 ratio. Adjust dose to hit your target GH first, then verify TDS. Our guide on how to remineralize RO water covers the process in detail, and RO vs tap water for shrimp helps you decide which route suits your setup.
Dechlorinate every water change - and keep changes small
Shrimp are highly sensitive to rapid shifts in water chemistry. Freshwater crustaceans are hyperregulators - they maintain mineral concentrations in their body fluids at levels higher than the surrounding water, doing so through active ion transport. A sudden large water change forces the shrimp's physiology to compensate fast. When the shift is too large or too quick, the result is osmotic shock: the shrimp's internal balance fails, and death follows within hours or days.
Keep water changes to 10-15% of tank volume at a time, match the temperature of replacement water to the tank, and always dechlorinate. For a full guide to safe water change practice, see shrimp tank water changes.
Feed lightly and let biofilm do most of the work
In a mature planted tank, biofilm and algae provide the majority of a shrimp's nutritional needs. Supplement with a quality shrimp food two to three times per week - a small pinch that shrimp finish within two hours. Overfeeding is one of the most common causes of ammonia spikes and shrimp deaths. Uneaten food decomposes fast. When in doubt, feed less. More detail in what do shrimp eat and overfeeding shrimp.
The 5 things beginners get wrong
These five errors account for the majority of first-colony failures. Knowing them in advance is worth more than any piece of equipment.
- Adding shrimp to an uncycled tank. Ammonia accumulates from the very first day. Without established nitrifying bacteria, it has nowhere to go. Shrimp will die within days. Test for 0 ppm ammonia and 0 ppm nitrite before stocking, no exceptions.
- Copper exposure. At concentrations a fish would shrug off without a visible reaction, shrimp are already in acute danger. Research on freshwater shrimp species has recorded 96-hour lethal concentrations at fractions of a milligram per litre - a vanishingly small amount. The sources in a typical shrimp tank are easy to miss: copper-based medications (common in treatments for parasites and algae), fertilizers that list copper sulfate or copper chelate in their ingredients, and first-draw water from copper plumbing (flush the tap for 30 seconds before drawing water for water changes). Never dose a shrimp tank with any medication that lists copper in its label. Check fertilizer labels carefully; some plant fertilizers marketed as shrimp-safe still contain trace copper. For a full breakdown, see copper and shrimp.
- Skipping drip acclimation. Pouring new shrimp directly from a bag into the tank exposes them to a sudden, potentially large shift in GH, KH, pH, and TDS all at once. Drip acclimate new arrivals over at least 60-90 minutes: place the shrimp and their bag water in a bucket, then run a slow drip (two to three drops per second) from the tank into the bucket until the volume has doubled. This gradual dilution lets the shrimp adjust. See the full process in drip acclimating shrimp.
- Choosing Caridina as a first shrimp. Crystal red and Taiwan bee shrimp look spectacular and carry a beginner-trap reputation for good reason. Their narrow parameter windows (pH 5.8-6.4, KH effectively 0-1) leave almost no room for error. An active buffering substrate is non-negotiable, RO water is non-negotiable, and the substrate itself exhausts its buffering capacity over time. Start with Neocaridina. Learn the hobby. Move to Caridina once you can manage a stable colony reliably.
- Mixing Neocaridina color lines. All Neocaridina color forms are the same species, selectively bred over generations for color. Mixed together, they interbreed freely - and the offspring revert toward the wild-type: a mottled, translucent brown. It happens gradually but reliably, typically within three to five generations. Keep color lines in separate tanks if you want to maintain color. A detailed look at how genetics and culling work is in Neocaridina color reversion.
For a fuller treatment of the most common beginner errors and how to diagnose what went wrong, see our dedicated article on beginner shrimp mistakes.
The beginner starter checklist: six things before you add shrimp
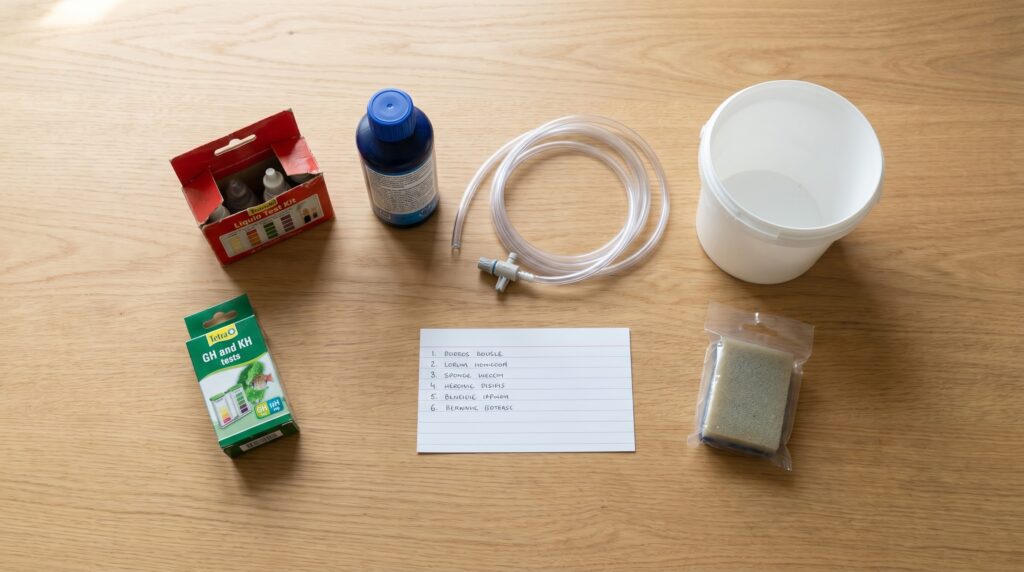
Run through this checklist before a single shrimp enters the tank. Every item here has cost a beginner a colony at some point.
| # | Task | Pass condition |
|---|---|---|
| 1 | Tank is fully cycled | Ammonia = 0 ppm, nitrite = 0 ppm, nitrate detectable (colony of nitrifying bacteria confirmed active) |
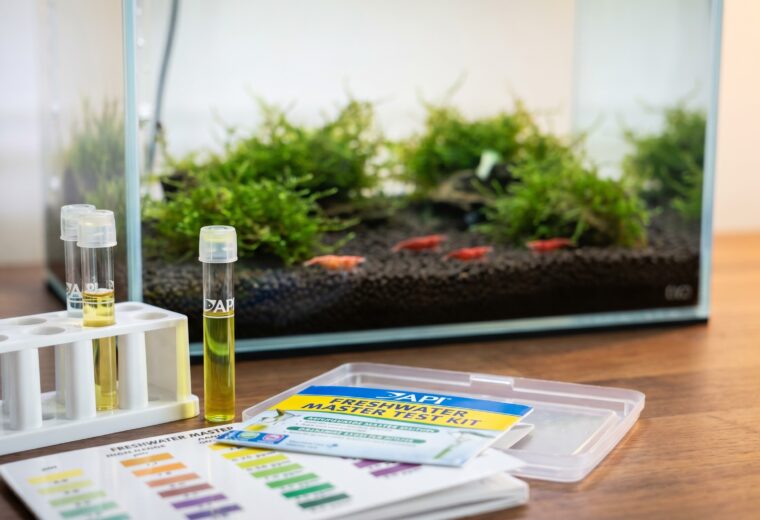
| 2 | Water parameters tested and in range | GH 6-8, KH 0-4, TDS 150-250, pH 6.5-7.5 for Neocaridina; use a liquid test kit (API GH and KH kit + master test kit), not strips |
| 3 | Filter is shrimp-safe | Sponge filter in place, OR power filter intake covered with a fine pre-filter sponge |
| 4 | No copper in the tank or water source | No copper-based medications in the cabinet; fertilizer label checked for copper compounds; tap water flushed 30 seconds before use if copper plumbing is possible |
| 5 | Dechlorinator on hand | A dechlorinator that removes both chlorine and chloramine is ready for every water change |
| 6 | Drip acclimation kit ready | A bucket, airline tubing, and a flow-control valve (or a simple knot in the tubing) prepared before shrimp arrive |
If any item on this list is a "not yet," hold off on buying shrimp. A two-week wait while the tank finishes cycling is not a delay - it is the difference between a colony that establishes and one that dies.
A note on molting
Shrimp cannot grow without molting: they shed their hard exoskeleton, expand their soft new body, then harden the new shell over 24-48 hours. This process depends on dissolved calcium and magnesium in the water, which is what GH measures. When GH falls too low, molts go wrong. The most visible sign of a bad molt is the white ring of death - a chalky pale stripe encircling the body where the carapace meets the abdomen, marking the point at which the old exoskeleton split but could not pull free. A shrimp showing this ring almost never survives; the focus shifts to finding and correcting whatever dropped the GH. Adding a cuttlebone to raise minerals will not fix the problem fast enough, because cuttlebone dissolves too slowly to rescue a shrimp already in a failed molt, and its effect on GH requires time and a low enough pH to trigger dissolution (it will not dissolve meaningfully above pH 7.8). The right fix is testing GH, identifying why it dropped, and correcting it before the next molt cycle. See white ring of death and shrimp molting explained for the full breakdown.
What a healthy, established colony looks like
Once a colony settles in - typically four to eight weeks after stocking - you will notice a rhythm. Shrimp graze constantly, picking at every surface. Females begin to carry eggs (berry-shaped clutches visible under the abdomen). Shrimplets appear, often hidden in moss or plant growth. The colony grows slowly at first, then faster as the breeding population matures.
At 20-30 shrimp per 10 litres (roughly 8-11 per US gallon - the practical ceiling most keepers cite is 10-15 adult Neocaridina per gallon before bioload becomes a problem), the tank is well-populated. A light water change every one to two weeks, consistent feeding, and stable parameters will keep the colony productive for years. Our guide on how many shrimp per gallon covers stocking density in detail.
If the colony stalls - no shrimplets visible after two months - check GH first, then temperature (below 20°C slows breeding significantly), then nitrate. These three variables account for most stalled breeding in otherwise healthy tanks. More on that in why shrimp are not breeding.
If you have not started yet, the single most useful thing you can do today is start the nitrogen cycle. Fill the tank, add dechlorinated water, seed it with a small ammonia source or a pinch of fish food, and let the biology build. Everything else - choosing your color form, setting up your drip acclimation kit, testing your tap water parameters - can happen in parallel over the next four to six weeks. The shrimp wait until the cycle is done. That one constraint, taken seriously, is what separates keepers whose first colony thrives from those who lose shrimp in week one.